It’s been a little while since I’ve written some new hidden Lightroom tips. These tips are not aimed at the advanced or newbie user as they’re tips I’ve been told about, they’re not the kind of thing you would pick up exploring the software. These new tips include things like the magic of Match Total Exposures, revealing what area you have a selected with an Adjustment Brush, making fine adjustments with touching sliders and more. If you find these tips handy check out my other Lightroom articles which includes other tip articles here.
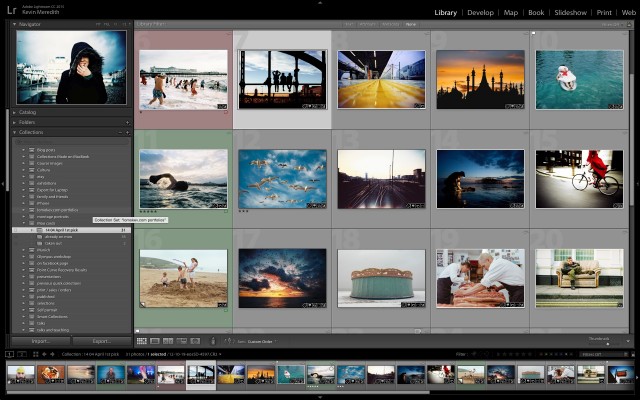
Toggling side bars with TAB
Pressing the TAB key toggles the side bars visibility, this is particularly handy in compare mode when looking at two landscape images side by side or for when you are searching for an image in grid view as it will enable you to fit more images on the screen.

Pressing Tab toggles side columns on and off to give more room for seeing photos.
Changing and hiding the Crop overlay
When using the crop tool in the develop module press O to cycle through different crop overlays including a thirds grid, small square grid, golden spiral and more. The grid of squares is particularly handy if you want to check if elements in your image are perfectly vertical or horizontal. If using an over lay that is not symmetrical like the golden spiral you can rotate it by pressing SHIFT + O. You can also hide the crop overlay altogether by pressing H.

Different crop overlays
Auto Advance when rating and flagging
Usually once you’ve rated a photo in the Library Module you will advance to the next photo buy pressing the Left Right arrow keys. Rating can be significantly speeded up if “Auto Advance” is switched on which can be found under ‘Photo’ in the menu bar. Once enabled if you rate a photo (0-5 to rate, P to flag, U to un-flag, X to reject or 6-9 to color) Lightroom will automatically advance to the next image saving you precious clicks and time.

Turn on Auto Advance to speed up image rating.
Showing what’s been painted with the Adjustment Brush
When selecting an area of the image with the Adjustment brush in the Develop module you can see the area which will be effected by pressing the ‘O’ key to highlight the area in Red. Pressing SHIFT + O will change the color of the overlay from red, green and white. This is handy when the adjustment being made is subtle and therefore hard to see where your selected area starts and ends.

Showing are affected by the adjustment brush is handy when making subtle adjustments
Making precise adjustments and resetting it to it’s default quickly.
If you click on a value’s name next to a slider you can then increase and decrease it’s value by pressing the + and – keys. If you ever want to return a value to it’s default double click the values name, for example if you double clicked exposure it would return the value to zero. Annoyingly this does not work when tweaking values affected by the radial filter, graduated filter or adjustment brush.

Tweaking settings with the + & – keys
Balancing exposures with Match Total Exposures
If you’ve been working with Lightroom for any length of time you will know by now it’s easy to sync settings across multiple photos but this won’t help if you have a set of images where the exposure varies between them. If you’ve bracketed exposures on a bunch of images by mistake this can really help out. Select the images that you want to match exposures, then click on the image with the exposure that you want the rest matched to. Make sure you are in develop module and then click ‘Settings’ > ‘Match Total Exposures’ in the main menu, your images will now have their exposure adjusted to match the target image.

Matching exposures is quick and painless
Stopping Lightroom opening the import dialog every time an SD card is mounted
Personally I don’t like the way Lightroom automatically opens the import dialog when I insert a Memory card. This can be turned off by going into the Preferences and un-ticking “Show import dialog when a memory card is detected”. Now if someone could tell me how to stop Apple’s new ‘Photos” app from launching every time I insert a memory card I would be eternally grateful!

Prevent import dialog when inserting memory card
Seeing what processes are going on
If multiple exports are running or certain other processes Lightroom will only ever show a maximum of 3 progress bars. To see a more detailed insight into what Lightroom is doing click on the progress bars. If Lightroom is running face detection, address lookups or syncing with Lightroom mobile these can be temporarily paused to speed up the other processes.

See all lightroom processes by clicking on progress bars
Start using Lightroom Mobile
If you’ve not started using Lightroom mobile yet you need to get into it now. You can use it to edit photos on a mobile device whether its Apple or Android and sync your mobile photos back to Lightroom desktop. What I use Lightroom mobile for is syncing selected collections from my desktop library to my phone, it makes it really convenient to show people my latest photos when I’m out and about. This is a quick tip so I’m not going to go deep into Lightroom Mobile setup, if you’ve got the latest version of Lightroom CC you should be good to go, if not read about setup on Adobe’s website.

Using Lightroom Mobile is by far the easiest way of getting photos onto your phone. Desktop left phone right.
On the left of every collection in your library there is a little tick box, if you tick it photos in that collection will be viewable on your mobile device in the Lightroom mobile app it’s that simple. It’s not just on a mobile device where you can view the synced images you can also view them in a web browser and allow others to view them to. If you want to know ore more about Lightroom collections and how to organise your library you can read my tutorial on organising a Lightroom library here.
More Lightroom tips and tutorials
If you found these Lightroom tips useful you might also enjoy my other Lightroom tutorials:
Turning on/off caps-lock also turns on/off Auto-Advance!
That is a fantastic tip as depending on I am doing I turn it on and off but I never new the short cut. Thanks.
If you have a Logitech keyboard and you find Caps Lock does not work yo may find the Logitech Setpoint utility has disabled it (and Scroll Lock). You can still toggle using the menu, just not the keyboard.
@jsam that’s a very niche problem!
Great tip … and just using the SHIFT key acts as a one-off modifier. E.g. if Auto-Advance is off and you do SHIFT-1 it will rate the pic 1-star then advance.
@fred that’s an awesome little tip.
Thank you for sharing the great tips! And here’s one for you. To disable Apple Photos from opening when you insert a memory card, open Image Capture when you insert a memory card or any device. On the left sidebar towards the bottom, there’s a triangle icon that points up/down, click on that and it will toggle a drawer. In there, it will say open application. Just select No Application from the drop down and you’re set. You’ll have to do this with each device you connect but OS X will remember your choice for each device. I believe there’s an option in Photos in preferences that’s global that will turn it off for all devices but I haven’t tested that one yet.
I found out something similar in the Photos app today. Unfortunately you have to do for every SD/CF card you own. It does not work globally for all SD cards. Thanks anyway.
Really great article, many thanks! This should help you with the Apple Photos problem.
http://lifehacker.com/uncheck-this-box-to-stop-photos-from-opening-when-you-c-1709336195
I’ve found I need to uncheck the tick box for each memory card I own (so Photos will continue to open until you’ve inserted all your cards and unchecked the box for each one). I guess Photos detects the serial number on each card and considers each one a different device.
P.S. Typo spotted: ‘sink’ should be ‘sync’
Thanks, it’s so annoying that you have to do it for every SD card, there must be way of tricking computer into thinking that all cards are the same? I’m never gonna be free of this as teach workshops and am always inserting students cards into my computer.
Thanks for pointing out the trypo, have corrected.
Try this hack to sto Photos app:
http://syd-low.com/2015/11/how-to-stop-photos-app-automatically-opening-when-you-insert-memory-card/
Thanks I will try that when I am back in my office. I am comfortable with terminal but blimey that’s not straight forward! “While you can change that on a per card basis, when you format the memory card the app will open again.” I did wonder why telling Photos to ignore the device next time round never worked, I always format cards when put them back in my cameras.