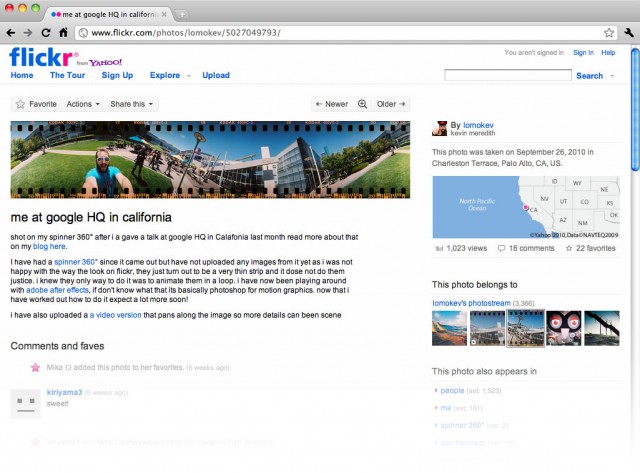
The Lomographic Spinner 360° camera came out earlier this year and a lot of people have been taking some really great photos with it. But for people wanting to post their spinner photos on the web there is a problem. The images that are produced by the spinner are much wider that normal photos so when displayed on the web you can’t make out all the details. Flickr’s standard image size on their photo pages is 640 by 640 pixels. This means that a spinner photo when 640 pixels wide will only be 124 pixels tall and that doesn’t have much impact.
My solution to these very thin images is to show a looping panning movie of them which allows people to see all the details of a spinner image without a scroll bar in sight! In this tutorial I will show you how to prepare your image in Adobe Photoshop CS5 and then how to make your movie in Adobe After Effects CS5. Although this tutorial is written with the Adobe Creative Suite 5 in mind it should be pretty much the same in older versions of the software. If you notice something that doesn’t work in CS4 drop me a line to info@lomokev.com, let me know and I will try and make changes. If you don’t have either of these great apps you can download a free 30 day trial from Adobe.
This article assumes that you have a basic knowledge of Adobe Photoshop and Adobe After Effects, their tools and terminology. This article is split into 2 parts: preparing your image and animation.
Preparing your image in Photoshop
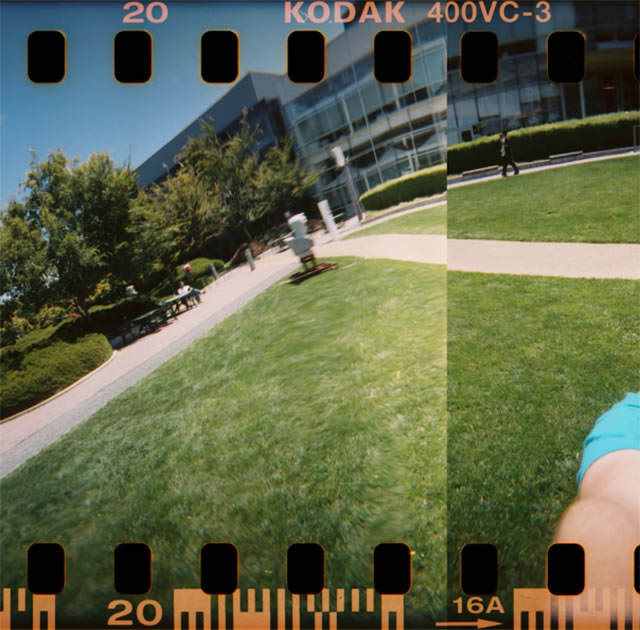
First of all you have to prepare your image so it loops perfectly. Even though the spinner 360 captures a 360° view the image won’t loop perfectly because of various factors including the angle of the camera changing during the exposure. The spinner 360° actually captures more that a 360° view, this is good as its gives a little more to play with when preparing our images. Open up your spinner image in Photoshop and look for a reference point where your image loops. In the image below this is where a statue is.

Using the marquee tool with its feather set to Zero select 2/3rds of the image from the right hand side of the image edge. Then copy and paste the selection and move it to the other side of the image, place it roughly in position so that your loop points are on top of each other. You may notice that even if your loop points are on top of each other some of the sprocket holes don’t have the correct spacing.

It’s best that the sprocket holes marry up exactly otherwise it will be really noticeable. Move your pasted layer so the sprocket holes line up. To get it exact turn the opacity of the top layer down to 50% so you can see the sprocket holes in both layers as you line them up. You will now see there is an obvious join in the image, most of the time this is easy fixed (with a little trial and error).
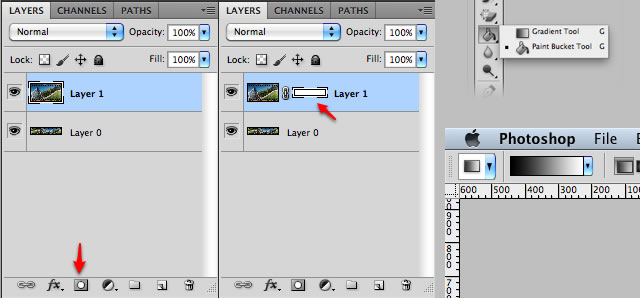
Create a layer mask by clicking on the new layer mask icon in the bottom of the layer palette, then select the gradient tool from the tool palette (if you can’t see it its usually under paint bucket tool. Right click and hold the paint bucket and you will see it appear). Set the gradient colour to go from black to white. You can do this in the tool option palette.
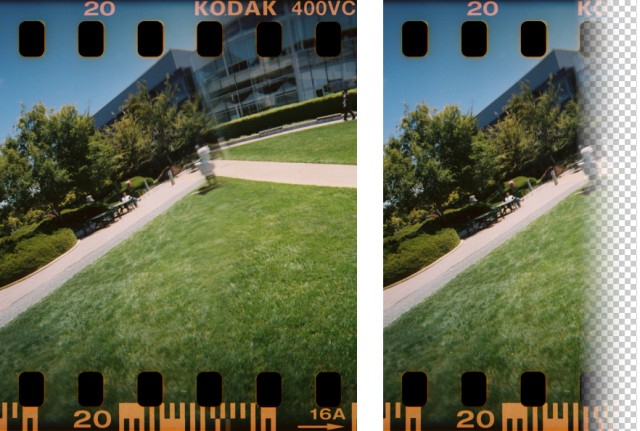
With your layer mask selected draw a line on your top layer from left to right, what this will do is give you soft edge on you top layer that is not as noticeable as what you had before although sometimes you can still see the join. If that’s the case just draw your line again in a different spot or different length until it looks right. Its amazing how much you can get away with. The image used for this tutorial has been online for 6 weeks and nobody has ever pointed out the dodgy join where there is a ghosting effect with the building above the statue! If this method does not work then you’re best off using the lasso tool to selectively cut away parts of your top layer until both layers are convincingly blended together.
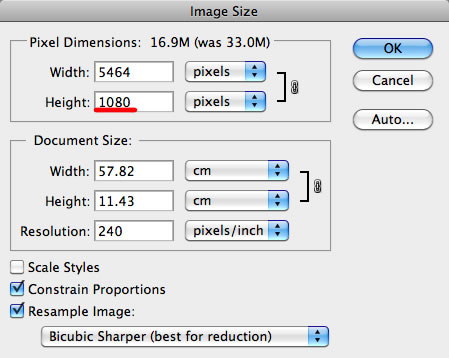
Now that you have a join that can’t be spotted easily you need to crop your image so that left and right are the same but before we do this we need to know what the target size of the final movie will be. I am going to make my movie so it is full HD. Full HD width is 1920 px wide by 1080 px tall. The 1st step is to resize the height of the image to 1080 px by going to Image > Image size… in the file menu and changing the images height to your desired new height in my case: 1080 px, it is import that you have “Constrain Proportions” ticked. The next step is to crop the image so that both ends of the image are the same.
Select the measure tool and pick a point in your image that is easily identifiable. In my image I am going to go for the very top corner point of the building then picking the sprocket nearest to it. The reason I am using a sprocket hole is that the edges are very sharp so its easy to pin point the exact edge. Zoom into 200% so you can be super accurate.
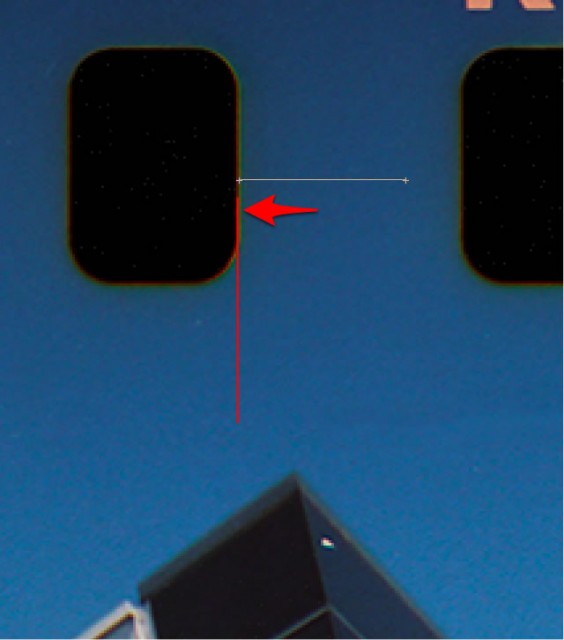
By clicking and dragging the ruler tool you can measure things in a Photoshop file, click on the very edge of the sprocket hold and drag the edge of the image so that the file starts to scroll. When you reach the same sprocket hole hover the mouse of the same spot that you clicked on the original sprocket hole let go of the mouse. If you now look at the info pallet you will see the width of your repeat in my case 4749 pixels.

By adding the width of your movie to space between the repeat points you will get the width of my repeatable image. 4749 + 1280 = 6669. We need to crop the sides off the image that we don’t need. To do this go to Image > Canvas Size… in the file menu enter your new width. You can now see that both ends of my image are exactly the same. You are now ready to start to animate. All you have to do is choose whether you are going animate in Flash or After Effects. Save you file as a PSD and a copy as jpeg. It is these files that you will use to animate with.

Looping the image in Adobe After Effects
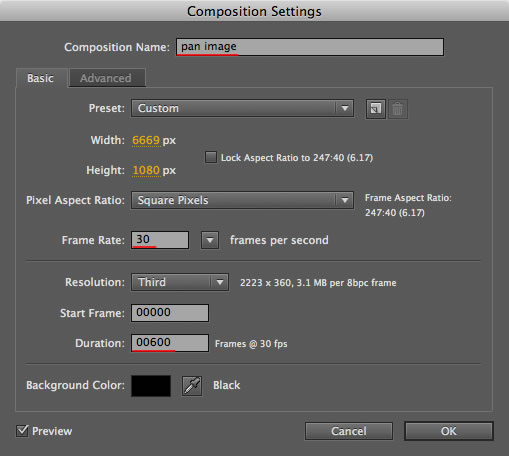
Open After Effects. By default you will see a new project. In the file menu choose: File > Import > File… to import the still jpeg image you created in Photoshop into After Effects. There should now be a composition in the project window with the same name as your photoshop file. Right click on the composition and select composition settings, change the composition name to “pan image”, set the frame rate to 30 and the duration to 600 frames.
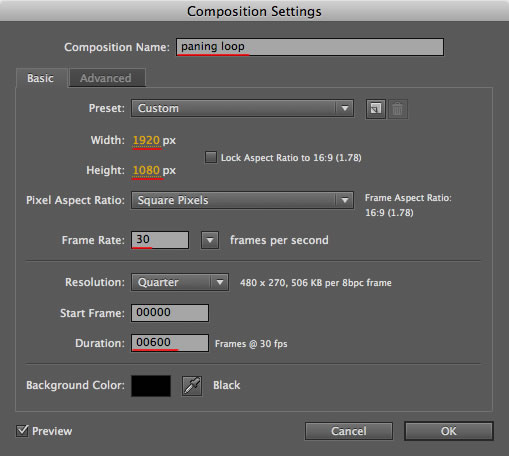
Click on Composition > New Composition in the file menu to make a new composition with the width and height you want your final movie to be. This will contain one loop of your image. In my case I want to be 1920 x 1080 at 30 frames a second. Setting the frame rate at 30 frames a second will give you the smooth playback. Set the length of the composition to 600 frames. This will mean it will take 20 seconds for your image to loop. You can use less frames if you want it to scroll faster or more if you want it to go slower.
You should now see the panning loop in the bottom window. Drag and drop your pan image from the project window into the bottom window.
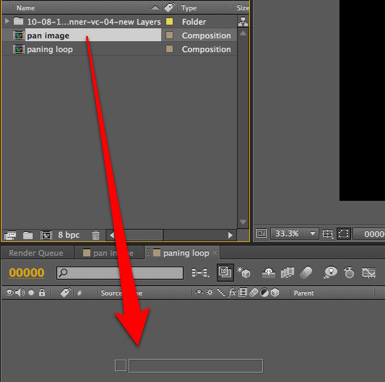
Next click on the little triangle on the pan image layer to see its attributes then click the arrow next to Transform. You should now see the settings for this layer. Change both the anchor points and both positions to “0”, this will align the left hand side of you image to the left hand side of the composition ready to panned from right to left.
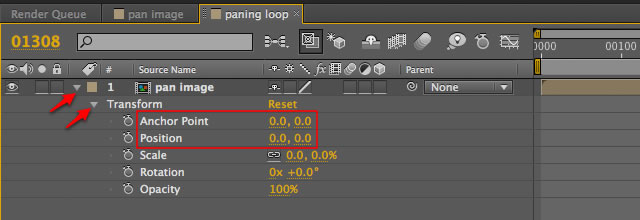
With play head still frame 0 click on the stop watch next to Position to set the first frame as a key frame then drag the time line to the end of your composition this should be frame 599 (or the last frame if you have more than 600 frames).

Make a new Key frame on the “position” setting in frame 599 by clicking on the stopwatch next to “position” again. Change the x position to the minus value of width your panning image minus the width of you movie in my case -4749 px (this should be the same number that you got from photoshop when measuring between you two loop points). If you now press play after effects will make a ram preview, once it gets to the end it will play in a loop perfectly.

The next step might seem a bit odd but you need to shorten your loop composition by one frame, the reason for this is that at the moment frame 0 and 599 both show the image in the same position, this means that image will be in the same spot for 2 frames when the composition loops round. This might not be that noticeable but its best to be super anal about these things. Right click on the panning like on “panning loop” in the Project window and select competition settings and change the composition length to 1 less than it was, in my case 600 to 599.
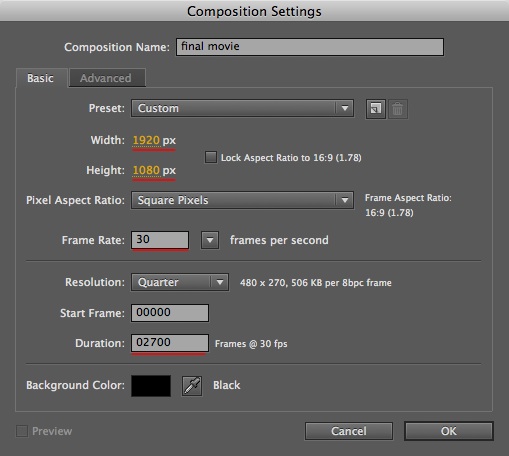
Now that you have made your looping composition we can now import this into a longer composition and loop it. In the file menu click on the Composition > New Composition, in the new composition settings set the width and height, frame rate the same as your panning movie, in my case that’s full HD (1920 px x 1080 px) at 30 fps. The length of this composition is going to the final length of your movie. My movie is going to 90 seconds long, to get the figure of my total frames I multiplied my movie length in seconds by its frame rate witch is my case is 90 x 30 which gives me 2700. Name the composition “final movie”.
Drag the panning loop composition into your final movie composition 5 times or as many you need to fill your movie’s length.
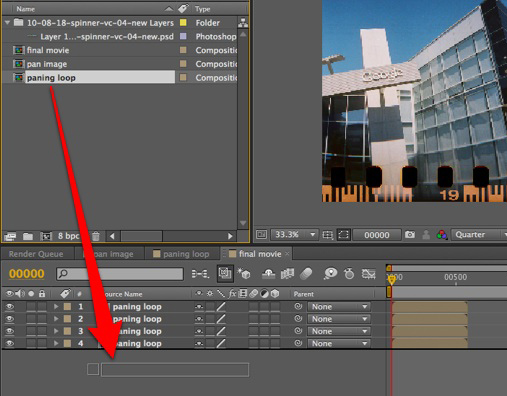
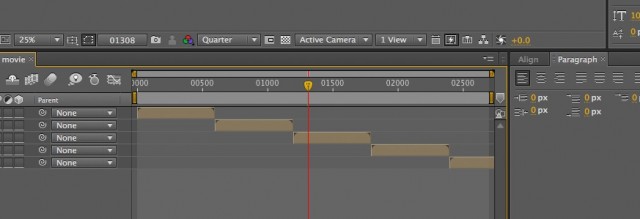
Select all your layers by Edit > Select All in the file menu and with all the layers selected go to Animation > Keyframe Assist > Sequence Layers… in the file menu. In the next window click ok and the layers should now be staggered so they play one after another.
The final thing to is render your finished movie so that it can be uploaded to wherever you want it to go. Click on the Render Queue tab and then drag your final movie composition into the render Queue. To change where the movie is saved to on your computer double click “Output To” and this will open a dialog box where you can change the file name a destination of your final movie.
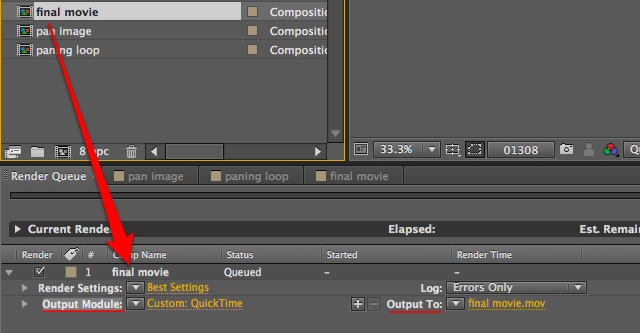
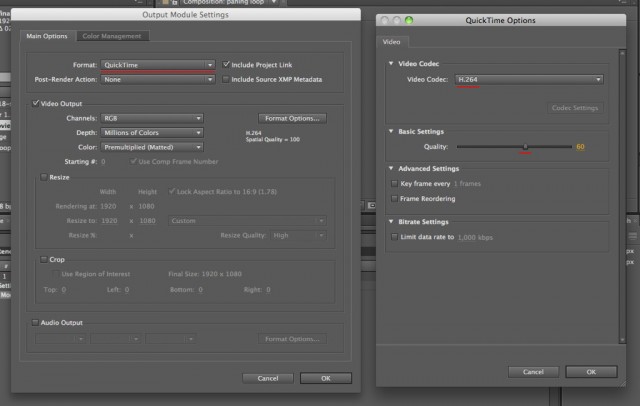
To set what format the movie is rendered in Double click on Output Module, set the format to QuickTime and then click on format options. Change the Video Codec to H.264 and then change the Quality to 60 click OK and then OK on Output Module Settings.
All you have to do now is hit render in the Render Queue Palette and wait. Once rendered you will have a nice full HD video that you can upload for the world to see!
